Connect Claude
Claude supports custom connectors on the Free, Pro, Max, Team and Enterprise plans. On Free you can add one custom connector.
Add the connector (web or Desktop)
Section titled “Add the connector (web or Desktop)”- Open Claude on claude.ai or in Claude Desktop.
- Go to Customize > Connectors and click Add custom connector.
- Enter the URL
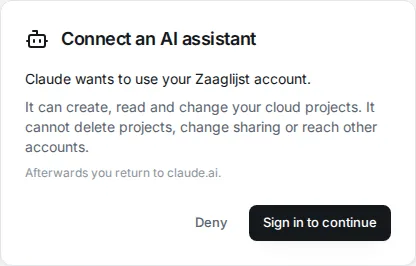
https://zaaglijst.contact-534.workers.dev/mcpand a name such asZaaglijst Studio. Leave the sign-in settings as Claude detects them. - Click Add, then Connect. The Zaaglijst Connect an AI assistant page opens.
- Sign in with your email link if asked. Check that the page names Claude and returns to claude.ai, then click Allow.
On a Team or Enterprise plan, an owner adds the connector under Organization settings > Connectors. Members then find it under Customize > Connectors and click Connect.
Use it in a chat
Section titled “Use it in a chat”- Click + in the message box and open Connectors.
- Switch Zaaglijst Studio on for this chat.
- Write your brief. See Get good results.
Claude asks before it uses a tool. Under Customize > Connectors you can set each tool to Always allow, Needs approval or Blocked. Allowing the reading tools (get_guide, get_schema, inspect_project, validate_project, render_views) saves many clicks; keep approval on apply_operations and create_project if you want to see each change.
Web, Desktop and mobile
Section titled “Web, Desktop and mobile”| Web | Desktop app | Mobile app | |
|---|---|---|---|
| Add the connector | Yes | Yes | In beta; use web or Desktop |
| Use it in a chat | Yes | Yes | Yes, once added to your account |
| Open the Studio link | Yes | Opens in your browser | Opens in your browser or the installed app |
The connector belongs to your Claude account, so you add it once and use it everywhere. On a phone, the fitting view is view only: you can turn the model, but you draw and drag on a larger screen.
Claude’s menus change over time. These steps were checked on 16 September 2026 against Anthropic’s guide to custom connectors.