Connect ChatGPT
ChatGPT only uses connectors that can change data in developer mode. OpenAI offers developer mode to Plus, Pro, Business, Enterprise and Education accounts, on the web. In a Business, Enterprise or Education workspace, an admin may have to allow it first.
Set it up on chatgpt.com
Section titled “Set it up on chatgpt.com”- Open chatgpt.com in a browser on a computer.
- Open Settings > Security and login and turn on Developer mode.
- Go to Plugins and click + to create an app for a remote MCP server.
- Enter a name, such as
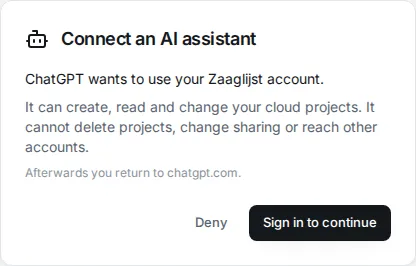
Zaaglijst Studio, and the URLhttps://zaaglijst.contact-534.workers.dev/mcp. Choose OAuth as the sign-in method, then create the app. - When ChatGPT sends you to the Zaaglijst Connect an AI assistant page, sign in if asked, check the names, and click Allow.
Use it in a chat
Section titled “Use it in a chat”- Start a new chat on chatgpt.com.
- Open the + menu, choose Developer mode and select Zaaglijst Studio.
- Write your brief. See Get good results.
- ChatGPT asks you to confirm each change to a project. Check the input it shows, then confirm.
After the connector’s tools change, click Refresh on the app and start a new chat.
Web, desktop and mobile
Section titled “Web, desktop and mobile”| chatgpt.com | Desktop app | Mobile app | |
|---|---|---|---|
| Turn on developer mode and add the app | Yes | Not documented | Not documented |
| Use the app in a chat | Yes | Not documented | Not documented |
| Open the Studio link | Yes | Opens in your browser | Opens in your browser or the installed app |
OpenAI documents developer mode for the web only. If the desktop or mobile app does not offer Developer mode in the + menu, continue the chat on chatgpt.com. Your project is in the Zaaglijst cloud, so you can open the Studio link on any device where you are signed in.
Drawings
Section titled “Drawings”The connector returns each drawing as an image and, where the server offers it, as a link that works for 24 hours. If ChatGPT does not show the image, ask for the drawing link.
These steps were checked on 16 September 2026 against OpenAI’s developer mode guide. ChatGPT’s menus change often; the guide has the current names.